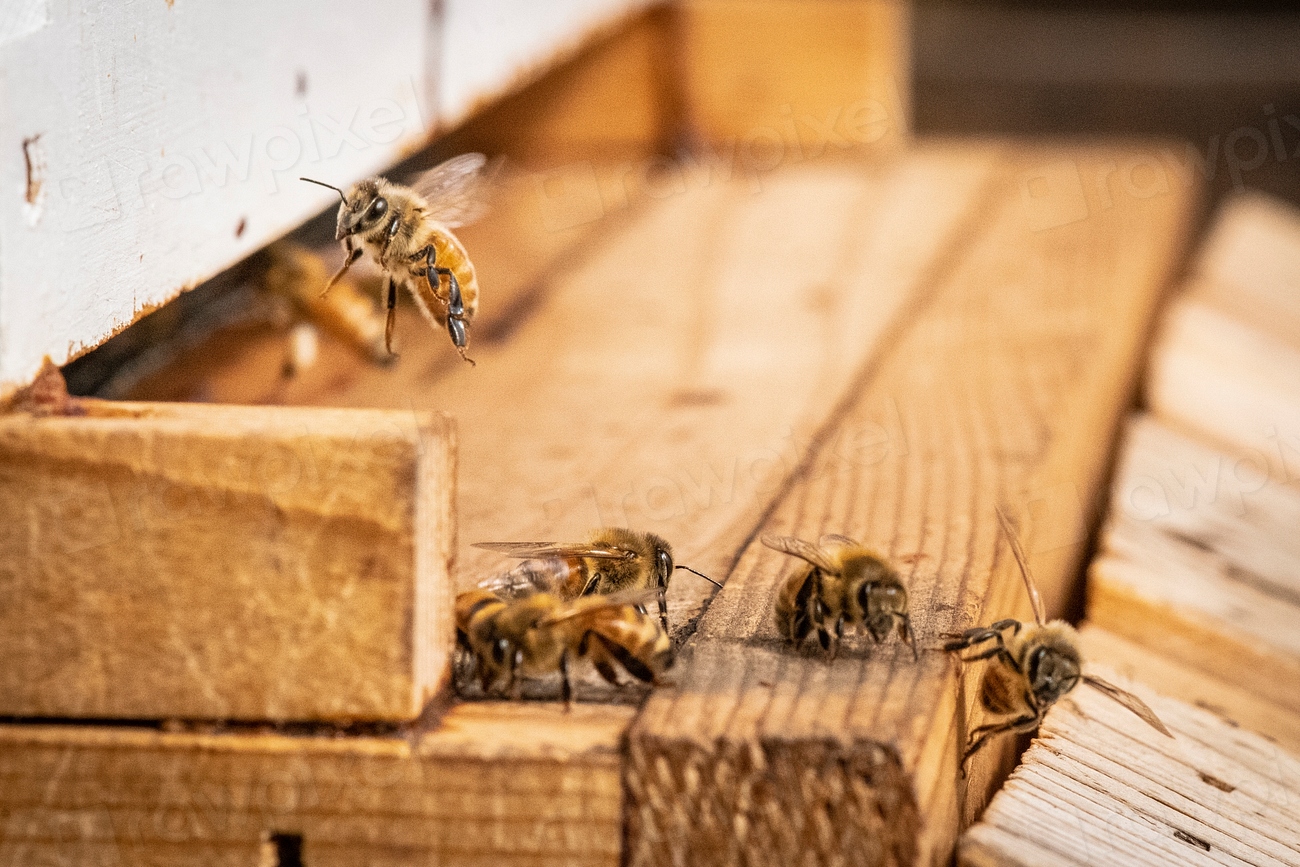
Beekeeping is a rewarding and fulfilling endeavor that not only contributes to the health of our environment but also provides delicious honey and beeswax products. However, to ensure your beekeeping journey is successful, it’s important to know how to care for your bees and help them thrive. Read on to learn about the fascinating world of beekeeping and how to make a positive impact on our buzzing friends
Essential Equipment for Beekeeping
Below is a comprehensive list of essential gear you’ll need to start your beekeeping adventure.
1. Beehive
The most critical component of beekeeping is, of course, the beehive. There are various types of hives available, but the Langstroth hive is the most popular choice among beekeepers due to its modular design. Other options include top-bar hives and Warre hives. When selecting a hive, consider the following:
– Size: Choose a hive size that suits your space and honey production goals.
– Material: Most hives are made of wood, but plastic hives are also available for easier maintenance.
2. Protective Gear
Safety is paramount when working with bees. Invest in high-quality protective gear to prevent stings and ensure a comfortable experience:
– Bee Suit: A full-body bee suit, preferably with a fitted hood, will protect your skin from stings.
– Gloves: Bee gloves should be long and durable, allowing for full mobility while keeping your hands safe.
– Veil: A separate veil can be worn with your suit or beekeeping jacket to protect your face and neck.
3. Smoker
A smoker is an essential tool for calming bees during inspections. It works by producing cool smoke, which masks the pheromones that bees release when they feel threatened. Regularly maintaining your smoker and using it properly can make hive management much smoother.
4. Hive Tool
A hive tool is a must-have for any beekeeper. This multi-purpose tool is used for:
– Prying apart hive boxes
– Scraping off excess wax and propolis
– Performing general hive maintenance
Investing in a good-quality hive tool will make your inspections and hive management much easier.
5. Bee Brush
A bee brush is a soft-bristled brush used to gently remove bees from frames during inspections without harming them. This tool is beneficial for ensuring that you can inspect frames without agitating the bees.
6. Frame Grip
A frame grip is a handy tool for safely lifting and inspecting frames within the hive. It allows you to get a good grip on the frames without squishing any bees, ensuring a more efficient and less stressful inspection process.
7. Honey Extractor
If you plan to harvest honey, a honey extractor is a valuable investment. This device allows you to extract honey from the honeycomb without damaging the frames. Extractors come in manual and electric versions, so choose one that fits your needs and budget.
8. Storage Containers
After harvesting honey, you’ll need appropriate storage containers. Consider using:
– Glass jars for retailing honey
– Food-grade buckets for bulk storage
9. Feeders
Depending on the season, your bees may need supplemental feeding. Beekeeping feeders come in various styles, including entrance feeders and hive-top feeders, to provide sugar syrup or pollen substitutes.
10. Record Keeping Supplies
Keeping accurate records of your beekeeping activities is crucial for monitoring the health of your hive and tracking honey production. Consider using:
– Notebooks or journals
– Digital apps for tracking hive inspections and treatments
Starting your beekeeping journey requires thoughtful planning and the right equipment. By investing in these essential tools, you’ll be well on your way to maintaining healthy hives and enjoying the sweet rewards of your hard work.
Establishing Your Beehive: A Step-by-Step Guide
Establishing your first beehive is an exciting and crucial step in your beekeeping journey. Whether you’re a beginner or looking to expand your current apiary, this guide will walk you through the essential steps to successfully set up your hive and ensure a thriving bee colony.
Choose the Right Location
Selecting the perfect location for your beehive is vital for the health and productivity of your bees. Consider the following factors:
– Sunlight: Aim for a spot that receives morning sun to help warm the hive and encourage early activity. Afternoon shade can help prevent overheating.
– Wind Protection: Position your hive in a sheltered area to protect it from strong winds.
– Water Source: Ensure there is a nearby water source, as bees need water for hydration and temperature regulation within the hive.
– Accessibility: Choose a location that is easily accessible for regular inspections and maintenance.
Assemble Your Hive
Once you’ve chosen the ideal location, it’s time to assemble your beehive. If you purchased a pre-manufactured hive, follow the manufacturer’s instructions for assembly. If you’re building your own, ensure that all components fit together securely. Key components to assemble include:
– Bottom board
– Hive body (brood chamber)
– Supers (honey storage)
– Frames and foundation
– Hive lid
Make sure to check for any sharp edges and sand them down for safety. If you are using used hives, soak them in diluted bleach-water overnight, then thoroughly rinse and allow to air dry several days.
Install Frames and Foundation
Install the frames with foundation into the hive body. The foundation provides bees with a base to build their comb. Ensure the frames are snugly fit and evenly spaced. This setup allows bees to move freely while working on their wax production and honey storage.
Acquire Bees
You have several options for acquiring bees to populate your hive:
– Package Bees: A common choice for beginners, package bees come in a wooden box with a queen and several worker bees.
– Nucleus Colony (Nuc): A nuc is a small, established colony that contains a queen, workers, and frames with brood. This option allows for a quicker establishment of your hive.
– Swarm Capture: If you’re feeling adventurous, you can capture a wild swarm. However, this option requires more experience and knowledge.
No matter which option you choose, ensure that the bees are healthy and free from disease.
Introduce the Bees to Their Hive
Once you have your bees, it’s time to introduce them to their new home. Follow these steps:
1. Prepare the Hive: Ensure that your hive is in place and ready for the bees.
2. Release the Bees: If using a package, carefully remove the queen cage and place the queen into the hive. Shake or gently pour the worker bees into the hive, ensuring they have access to the frames.
3. Close the Hive: Once the bees are in, close the hive and leave them undisturbed for a few days to acclimate to their new environment.
Monitor the Hive
After establishing your hive, it’s important to monitor it regularly. Check for signs of activity and assess the health of your colony. Look for:
– Bee activity at the entrance
– Signs of foraging
– The queen’s presence and brood development
Perform regular inspections every 7-10 days during the active season to ensure the colony is thriving.
Provide Ongoing Care
Caring for your bees is an ongoing commitment. Ensure that they have access to food (sugar syrup or pollen substitutes if necessary), and monitor for pests and diseases. Be prepared to manage the hive by adding supers for honey storage and performing necessary treatments.
Monitoring and Managing Pests and Diseases in Your Beehive
One of the key responsibilities of a beekeeper is to ensure the health and well-being of your bees. Pests and diseases can pose serious threats to your hive, so it’s essential to be vigilant and proactive in monitoring for these issues. Below are some common pests and diseases to watch out for, along with tips on how to treat them.
Varroa Mite
Varroa mites are one of the most significant threats to honeybee colonies worldwide. These tiny parasites attach themselves to bees and feed on their bodily fluids, weakening the bees and spreading viruses.
Signs to Monitor:
– Bees with deformed wings
– A decrease in overall bee population
– Mites visible on adult bees or on brood
Treatment:
– Chemical Treatments: Products like miticides (e.g., Apivar, Varroa Away) can be used according to the manufacturer’s instructions.
– Integrated Pest Management (IPM): Combine treatments with natural methods such as drone brood removal and screen bottom boards to reduce mite populations.
Small Hive Beetle
The small hive beetle is another pest that can disrupt hive health. These beetles can cause damage to honey, pollen, and brood, leading to weakened colonies.
Signs to Monitor:
– Beetles crawling on hive surfaces
– Fermentation of honey or pollen
– Signs of stress in the bee colony
Treatment:
– Traps: Use small hive beetle traps filled with oil to capture and kill beetles.
– Maintain Hive Hygiene: Regularly clean the hive and remove any debris that may provide shelter for beetles.
American Foulbrood (AFB)
American foulbrood is a highly contagious bacterial disease that affects bee larvae. It can decimate entire colonies if left untreated.
Signs to Monitor:
– Sunken, discolored brood cells
– A foul odor emanating from the hive
– Ropey appearance of dead larvae when disturbed
Treatment:
– Destroy Infected Colonies: The most effective way to manage AFB is to destroy the affected colony and burn all materials.
– Burn Contaminated Equipment: All hive components that were in contact with the infected bees should be burned to prevent the spread of the disease.
Nosema
Nosema is a fungal disease that affects the digestive system of bees, leading to reduced lifespan and colony strength.
Signs to Monitor:
– Bees with dysentery (feces on the hive exterior)
– Decreased activity and foraging
– Poor brood development
Treatment:
– Medications: Use treatments like Fumagillin B to combat Nosema, following the manufacturer’s guidelines.
– Improve Nutrition: Providing supplemental feeding can help strengthen the bees’ immune systems.
European Foulbrood (EFB)
European foulbrood is another bacterial disease but is generally less lethal than AFB. It affects young larvae and can lead to colony decline.
Signs to Monitor:
– Yellow or brown larvae that die in the cell
– A sour odor from the hive
– Patchy brood patterns
Treatment:
– Antibiotics: Administer oxytetracycline as per guidelines to treat EFB.
– Hive Management: Improve hive conditions by ensuring proper ventilation, reducing stress, and maintaining a healthy queen.
Tracheal Mites
Tracheal mites infest the breathing tubes of bees and can lead to respiratory issues and weakened colonies.
Signs to Monitor:
– Bees exhibiting labored breathing
– Increased bee mortality during winter
– Decreased honey production
Treatment:
– Chemical Treatments: Use products like menthol or other approved treatments to reduce mite populations.
– Strong Colonies: Maintain healthy, strong colonies to better withstand tracheal mite infestations.
Natural Remedies For Your Bees
There are several natural remedies that beekeepers can use to manage pests and diseases in their hives. These remedies often focus on promoting bee health and maintaining a balanced hive environment. Here are some popular natural treatments:
Essential Oils
– Peppermint Oil: Used primarily for its antifungal properties, peppermint oil can help combat Nosema. A few drops can be added to sugar syrup.
– Tea Tree Oil: Known for its antibacterial and antifungal properties, tea tree oil can be diluted and used in small amounts to help manage certain pathogens.
– Cinnamon Oil: This oil can act as a repellent for some pests and has antifungal properties. It can be mixed with sugar syrup for feeding.
Oxalic Acid
Oxalic acid is a naturally occurring compound found in many plants. It can be used as a treatment for Varroa mites. It can be applied in several ways:
– Sublimation: This method involves heating oxalic acid crystals to create vapors that penetrate the hive and kill mites.
– Dribble Method: A sugar syrup solution containing oxalic acid can be dribbled onto bees in the hive.
Sugar Dusting
Dusting bees with powdered sugar can help control Varroa mite populations. The sugar causes the mites to fall off the bees, allowing them to be removed from the hive. This method is often used in conjunction with other treatments.
Drone Brood Removal
Varroa mites prefer to reproduce in drone brood. By selectively removing drone frames and culling them, beekeepers can reduce the mite population. This method is most effective when done regularly.
Propolis
Bees produce propolis, a resinous substance collected from tree buds and other sources. Propolis has natural antibacterial and antifungal properties and can help maintain hive health. Some beekeepers use it as a supplement, while others encourage propolis production by providing materials for bees to collect.
Garlic
Garlic has natural antifungal and antibacterial properties. Some beekeepers mix crushed garlic with sugar syrup and feed it to their bees to help boost their immune systems.
Vinegar
Apple cider vinegar can be used in small amounts as a natural treatment for certain pests. Some beekeepers use it as a cleaning solution for hive tools or as a component in natural hive treatments.
Plant-Based Remedies
Certain plants can be beneficial for bee health:
– Marshmallow Root: Known for its soothing properties, it can be used in teas or syrups to help support bee health.
– Calendula: This flower has antifungal properties and can be used in herbal mixtures for bees.
Thyme
Thyme can be used as a natural treatment for certain beekeeping challenges, particularly in managing pests like Varroa mites. Thyme contains thymol, a natural compound with insecticidal properties that can effectively help reduce Varroa mite populations. Here’s how you can use thyme as a treatment:
- Thyme Essential Oil:
– Purchase or distill thyme essential oil that contains high levels of thymol. Ensure you are using a high-quality product intended for use in beekeeping.
– Dosage: Typically, a dosage of around 2-3 grams of thymol per hive is recommended.
– Application: Place the essential oil on a cotton ball or small piece of paper towel. Place this in the hive near the brood area, ensuring that it does not come into direct contact with the bees. The vapors will spread throughout the hive and help control the mites.
- Thymol Crystals:
– Purchase thymol crystals from a beekeeping supply store.
– Preparation: Thymol crystals can be dissolved in a carrier oil or sugar syrup.
– Application: Place the solution in a small container or use a bee-safe dispenser inside the hive. The thymol will evaporate, creating a vapor that can help reduce mite populations.
- Thyme Tea
– Steep about 1 cup of fresh or dried thyme in 1 quart (approximately 1 liter) of boiling water for about 15-20 minutes.
– Allow the mixture to cool completely.
– Strain the tea to remove the thyme leaves and any particles.
– If you want to provide additional energy for your bees, you can mix the thyme tea with a sugar syrup. A common ratio is 1:1 (one part sugar to one part water).
– Combine the cooled thyme tea with the sugar syrup to create a sweetened infusion.
– Use a hive feeder (such as a top feeder or entrance feeder) to provide the thyme tea mixture to your bees.
– Monitor the feeder to ensure it’s not attracting unwanted pests like small hive beetles or ants.
– Consider feeding thyme tea during times of stress for the bees, such as after a treatment for pests or during periods of low forage availability. It can provide them with nourishment and potentially support their immune system.
*Apply thymol treatments during times of the year when the number of brood cells is lower, typically in late summer or early fall. This helps minimize disruption to the bee population since young bees are more vulnerable to treatments.
*Ensure adequate ventilation in the hive when using thymol, as this can help disperse the vapors effectively and reduce the risk of overheating the bees.
*After treatment, observe your bees for any signs of stress or adverse reactions. It’s essential to ensure that the bees are not negatively impacted by the treatment.
Good Hive Management Practices
Maintaining strong and healthy colonies is one of the best defenses against pests and diseases. Regular inspections, good nutrition, and proper hive placement can significantly reduce the risk of infestations and infections.
Extracting Honey: A Step-by-Step Guide
Harvesting honey is one of the most rewarding aspects of beekeeping. After months of care and attention to your bees, extracting honey allows you to enjoy the fruits of their labor. This guide will walk you through the process of extracting honey from your hive, ensuring that you do so with care for both the bees and the honey.
Gather Your Equipment
Before you begin extracting honey, make sure you have the following equipment on hand:
– Honey Extractor: This device will spin the honey out of the comb. Extractors can be manual or electric.
– Hive Tool: This multi-purpose tool is essential for prying apart hive components and lifting frames.
– Bee Brush: A soft-bristled brush used to gently remove bees from the honey frames without harming them.
– Uncapping Knife or Fork: This tool is used to remove the wax cappings from the honeycomb.
– Strainer or Filter: To filter out wax particles and impurities from the extracted honey.
– Buckets or Jars: For collecting and storing the honey after extraction.
– Protective Gear: Wear a bee suit and gloves to ensure your safety while handling the frames.
Determine When to Harvest
Timing is critical when it comes to honey extraction. Here are some signs that your honey is ready for harvesting:
– Capped Honey: Wait until at least 80-90% of the cells in the honeycomb are capped with wax. This indicates that the honey has reached the right moisture content.
– Season: Late summer or early fall is often the best time to harvest honey, as this is when bees have capped their surplus stores.
Remove Frames from the Hive
1. Prepare Your Area: Set up your extraction area away from the hive, ideally in a shaded and clean location.
2. Open the Hive: Use your hive tool to pry open the hive gently. Remove the frames with capped honey carefully, minimizing disturbance to the bees.
3. Brush Off Bees: Use the bee brush to gently brush off any bees clinging to the frames. You can also use a bee escape board or wait a short time for the bees to leave the frames.
Uncap the Honeycomb
1. Use the Uncapping Knife: Hold the honey frame over a bucket or container to catch any drips. Use the uncapping knife or fork to slice through the wax cappings on both sides of the frame.
2. Remove Wax Cappings: Ensure that all cells are uncapped, exposing the honey inside. The wax cappings can be collected and saved for making candles or other projects.
Extract the Honey
1. Load the Extractor: Place the uncapped frames into the honey extractor, ensuring they are evenly spaced for balance.
2. Spin the Extractor: If using a manual extractor, crank the handle to spin the frames. For electric extractors, turn it on and let it run. The centrifugal force will pull the honey out of the comb and into the bottom of the extractor.
3. Repeat: Continue this process until all frames have been extracted.
Strain and Store the Honey
1. Strain the Honey: Use a strainer or filter to pour the extracted honey into a bucket or jar, removing any wax particles and debris.
2. Store the Honey: Transfer the filtered honey into clean jars or containers. Seal tightly and label with the harvest date. Store the honey in a cool, dark place to preserve its flavor and quality.
Clean Up
After extraction, make sure to clean your equipment properly to prevent any contamination for future uses. Remove any leftover wax from the extractor and tools, and store everything in a dry place.
Winterizing Your Bees: Essential Care for Cold Months
As winter approaches, beekeepers must take steps to prepare their hives for the colder months. Proper winterization ensures that your bees remain healthy and strong, minimizing the risk of colony loss during the harsh winter. This guide outlines essential practices for winterizing your bees and caring for them throughout the winter season.
Understanding Bee Behavior in Winter
Honeybees are social insects that work together to survive the winter. As temperatures drop, bees cluster together in the hive, forming a tight ball to generate warmth. The queen remains in the center of the cluster, where the temperature is highest, while worker bees rotate positions to ensure all members stay warm. Understanding this behavior is crucial for effective winter management.
Preparing Your Hive for Winter
1. Assess Hive Strength: Before winter, evaluate the strength of your colonies. A strong hive with a healthy population is more likely to survive the winter. If you have weak colonies, consider combining them with stronger ones.
2. Reduce Hive Entrance: To help protect against cold winds and to deter predators, reduce the hive entrance using entrance reducers. This will also help the bees maintain warmth within the hive.
3. Insulation: Adding insulation to your hive can help regulate temperature and retain warmth. You can use materials like foam board, straw, or specialized beehive insulation wraps. Ensure adequate ventilation to prevent moisture buildup.
4. Check Food Stores: Bees need sufficient food stores to survive the winter. Before winter sets in, inspect the hive for honey reserves. Ideally, a healthy colony should have at least 60-80 pounds (27-36 kg) of honey stored. If food stores are low, consider feeding your bees sugar syrup or fondant as a supplement.
5. Remove Unneeded Supers: If you have extra supers or equipment on your hive that won’t be needed during winter, remove them to minimize the space the bees need to warm.
Caring for Your Bees During Winter
1. Regular Inspections: Throughout the winter months, perform periodic inspections (about once a month) to check the health of your bees. Look for signs of moisture, mold, or any unusual activity. Avoid opening the hive too much, as this can disrupt the bees’ cluster.
2. Monitor Moisture Levels: Excess moisture can lead to mold and other issues within the hive. Ensure proper ventilation by leaving a top entrance or installing a vent system to allow moisture to escape while keeping the hive warm.
3. Feeding: If food stores are low, continue to provide supplemental feeding. Sugar cakes or fondant can be placed on the top bars of the frames for easy access, ensuring that the bees have enough food without the need for frequent hive openings.
4. Protection from Pests: Keep an eye on potential pests, such as mice or small hive beetles, that may try to enter the hive during winter. Use mouse guards at the entrance and monitor for any signs of infestation.
5. Avoid Disturbance: Minimize disturbance to the hive during the winter. Bees are more vulnerable during this time, and excessive handling can stress the colony.
Remember that healthy bees lead to productive hives, and the care you provide in winter will pay off as you welcome the new beekeeping season.
Establishing your beehive is an exciting and rewarding process that sets the foundation for a successful beekeeping journey. By following these steps, you’ll create a thriving environment for your bees, allowing them to flourish and produce honey for you to enjoy. Stay informed about the latest treatments and best practices in beekeeping to ensure the well-being of your bee colony. Always monitor your bees’ responses to any treatment and adjust your methods as needed. If you have any questions or need additional information, don’t hesitate to reach out through our contact page. Happy beekeeping!